One of the core components of a smart city is automated traffic
management. And that got me thinking – could I use my data science
chops to build a vehicle detection model that could play a part in smart
traffic management?
Think about it – if you could integrate a vehicle detection system in a traffic light camera, you could easily track a number of useful things simultaneously:
• How many vehicles are present at the traffic junction during the day?
• What time does the traffic build up?
• What kind of vehicles are traversing the junction (heavy vehicles, cars, etc.)?
• Is there a way to optimize the traffic and distribute it through a different street?
And so on. The applications are endless!
Now, we will see how to build our vehicle detection system! We will be using the computer vision library OpenCV (version – 4.0.0) a lot in this implementation
Table of Contents
Step 1 : Let’s first install the required libraries and the modules
Firstly open Command Prompt and type the following lines
pip install numpy
pip install matplotlib
pip install cv
Now lets first import required libraries and the modules
IMPORT LIBRARIES:.
import os
import re
import cv2 # opencv library
import numpy as np
from os.path import isfile, join
import matplotlib.pyplot as plt
Now download any image which has vehicle in it and save in a folder name frames inside python directory.From that folder we will import frames and keep them in a list.
Step 2 : we need to IMPORT FRAMES:
# get file names of the frames
col_frames = os.listdir('frames/')

# sort file names
col_frames.sort(key=lambda f: int(re.sub('\D', '', f)))

# empty list to store the frames
col_images=[]

for i in col_frames:
    # read the frames
    img = cv2.imread('frames/'+i)
    # append the frames to the list
    col_images.append(img)
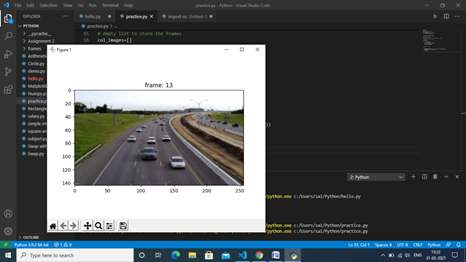
Step 3 : DATA EXPLORATION:
# plot 13th frame
i = 13
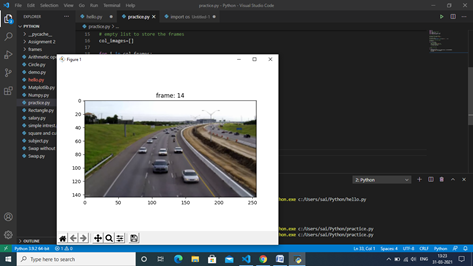
for frame in [i, i+1]:
plt.imshow(cv2.cvtColor(col_images[frame], cv2.COLOR_BGR2RGB))
plt.title("frame: "+str(frame))
plt.show()
Step 4 : Output look like this
Step 5 : convert the frames to grayscale
It is hard to find any difference in these two frames, isn’t it? As discussed earlier, taking the difference of the pixel values of two consecutive frames will help us observe the moving objects. So, let’s use the technique on the above two frames:
# convert the frames to grayscale
grayA = cv2.cvtColor(col_images[i], cv2.COLOR_BGR2GRAY)
grayB = cv2.cvtColor(col_images[i+1], cv2.COLOR_BGR2GRAY)

# plot the image after frame differencing
plt.imshow(cv2.absdiff(grayB, grayA), cmap = 'gray')
plt.show()
Here we have converted the previous image to grayscale so that we can easily identify the difference.
OUTPUT:
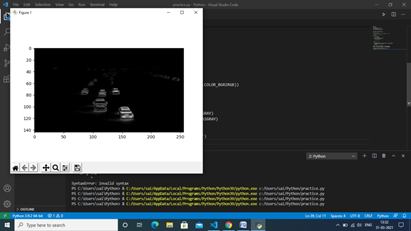
Now we can clearly see the moving objects in the 13th and 14th frames. Everything else that was not moving has been subtracted out.
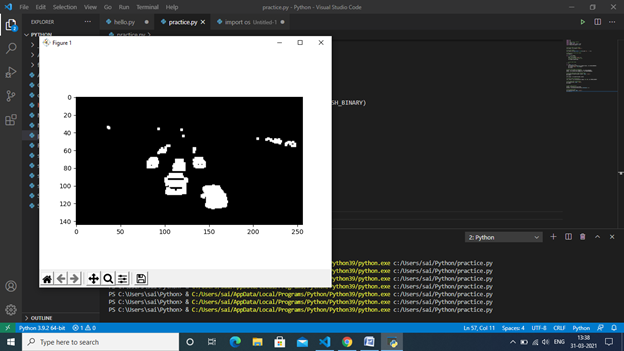
Step 6 : Image Pre-processing
Let’s see what happens after applying thresholding to the above image:
diff_image = cv2.absdiff(grayB, grayA)

# perform image thresholding
ret, thresh = cv2.threshold(diff_image, 30, 255, cv2.THRESH_BINARY)

# plot image after thresholding
plt.imshow(thresh, cmap = 'gray')
plt.show()
Output
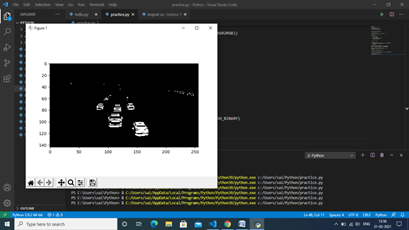
Now, the moving objects (vehicles) look more promising and most of the noise (undesired white regions) are gone. However, the highlighted regions are a bit fragmented. So, we can apply image dilation over this image
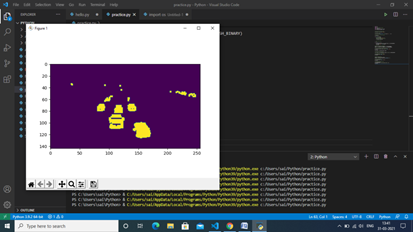
Step 7: apply image dilation
kernel = np.ones((3,3),np.uint8)
dilated = cv2.dilate(thresh,kernel,iterations = 1)
# plot dilated image
plt.imshow(dilated, cmap = ‘gray’)
plt.show()
Step 8 : plot vehicle detection zone
# plot vehicle detection zone
plt.imshow(dilated)
cv2.line(dilated, (0, 80),(256,80),(100, 0, 0))
plt.show()
Output :
# find contours
contours, hierarchy = cv2.findContours(thresh.copy(),cv2.RETR_TREE,cv2.CHAIN_APPROX_NONE)


valid_cntrs = []

for i,cntr in enumerate(contours):
    x,y,w,h = cv2.boundingRect(cntr)
    if (x <= 200) & (y >= 80) & (cv2.contourArea(cntr) >= 25):
        valid_cntrs.append(cntr)

# count of discovered contours
len(valid_cntrs)
Next, let’s plot the contours along with the original frame:
dmy = col_images[13].copy()
cv2.drawContours(dmy, valid_cntrs, -1, (127,200,0), 2)
cv2.line(dmy, (0, 80),(256,80),(100, 255, 255))
plt.imshow(dmy)
plt.show()
Output :

Cool! Contours of only those vehicles that are inside the detection zone are visible. This is how we detect vehicles in the frames.
Summary :
In this article we saw How to perform Vehicle Detection using Python and opencv so about this article you have any query then free to ask me
Credit :
Name:-Samyak Dilip Kothari
Education:-3rd year Engineering